Wednesday, August 31, 2011

WIP Wednesday for 100 Quilts for Kids, and a Travel Handmade linkup

WIP Wednesday at Freshly Pieced
Whew! Lots to show and talk about this week! I am going to try to format this correctly this week so that we can stay organized....

Ongoing projects:
100 Quilts for Kids QAL- currently doing okay?
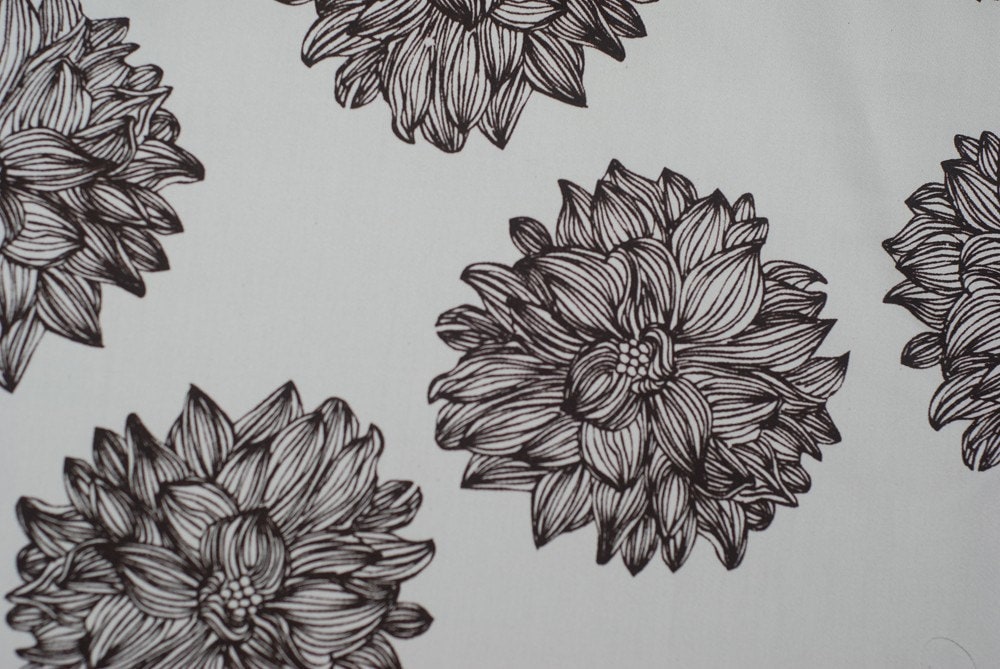
A new work in progress, started this week as my project for 100 Quilts for Kids, the charity quilt drive at Swim Bike Quilt. I am following the QAL using the Storytime Squares pattern from Made by Rae. I used some charm squares from my stash for this one, and hope that kids like brown. Will it be okay? I think it will be cute, but hope that the occasional florals will not dissuade a boy from liking it too. 
So I added my second row of piecing last night and saw that I really do need to find/replace my 1/4" quilting foot. My top right squares do not line up, and since I have also somehow misplaced my seam ripper, I am going to have to fix it after a trip to my LQS.

Echino squared inspired quilt for Parisville fabric- progress to quilt top piecing
Posted here previously, now on the wall and possibly I am going to rip up some blocks or replace some with more white space to calm down the crazy. More to come when seam ripper is replaced.

Super large Amy Butler bag- finished
Someday I will get a new camera, I promise. For now, please forgive my poor photos and lighting, I am simply making do with the fact that I rarely finish anything during the day. And forgive my lack of process shots. There is no room for extra brain power to take photos while following an AB pattern. This is the Modern Diaper Bag from Amy Butler's Little Stitches for Little Ones. First off, wow. This bag is gigantic. As I cut out the pattern, this became more and more obvious, but I somehow thought in my delusion that it would get smaller as I sewed it, as if the seam allowances were 5 inches instead of 1/2 inch. 
That being said, I am really pleased with how it turned out, and very pleased with my color and fabric choices. Alas, I did not get to use Ms. Butler's fabrics for the bag, and even more of a bummer, have no idea what this fabric is called or what line it is from, as it came from the stash. 
I do like how the stripes compliment the damask print, and I don't usually work with grey and yellow, but love the way it matches up here. 
I actually gifted this to a friend to use for her baby, as I know she loves a large bag and travels quite a bit. I hope she loves it and gets lots of use out of it!
Travel Handmade with The Sewing Summit

No "real" progress: 
  1. Plans for rest of Kona Poseidon FQs
  2. Plan for pomegranate colorway of Parisville- I am thinking a Kaleidoscope quilt though, using Don't Call Me Betsy's QAL
  3. Plan/start the second quilt top for 100 Quilts for Kids
  4. Start the Little Apples string block quilt top

Monday, August 29, 2011

Putting together a quilt- opinions needed!

I began working on piecing blocks for my other Parisville quilt this weekend, the one inspired by Fresh Lemons' Echino Squared (as as I tend to think of it Echino2). So far so good. Used my scissors, as per my last post, and happy with the way blocks looked in piecing- at least for the most part.


These look nice, I think. I decided to mix the fabrics, patterns and colors in the blocks to create some more interest and less uniformity. I think this may be where I got off track. I did it sort of off the cuff, so then when I pieced the blocks and then started laying them out, things were looking a bit off...


Exhibit A. What the....? This looks so odd to me. Granted, I pieced it last night just working kinda randomly to see what worked and how big it looked with 4 blocks by 5 blocks and how to arrange. But still. I did not love this layout at all, and didn't love how the blocks looked together.

So this morning I went back out and tried again, rearranged a few blocks, and got to wondering why some things looked off.


Exhibit B. I like this arrangement better, but I could use some help figuring out where I am going wrong. Do I need more white space? More careful arranging of the blocks for color coordination? Do I need to cut up some of the topiary fabric to make it work better? (NB: the topiary background is more cream than white.)

I'd love some assistance.

Sunday, August 28, 2011

Why I returned to scissors, pencil and ruler: a story of disillusionment

No kidding, I am through with rotary cutters. A few reasons you ask? Gladly.
1) I always make more mistakes than the time it saves me and end up wasting fabric cuts.
2) I have issues making it go straight.
3) My blade is always dulling wicked fast so I have to go back and cut the missed spots with scissors anyway.
4) My cutting area happens to be my dining room table which (no coincidence) is also where my toddler eats yogurt and applesauce, with a spoon, by himself. Equals epic mess (but also mommy pride).

So I did all my cutting for the Parisville mist colorway quilt the old fashioned way- and I loved it! Never turning back. I used the Echino Squared quilt from Fresh Lemons as inspiration (thanks Toni!) though mine is of course not going to look much like this! Once again I muddled it all out myself in all of 20 minutes and then started cutting. I am impetuous like that.

Wednesday, August 24, 2011

Work in progress Wednesday- with a finish!


Yes, let's start with the finish, because I am so glad I am done- er, i mean, I am so proud of it. This quilt proved to be difficult in the end- maybe I just had it too easy piecing it in the beginning. Either way, I am  proud of the finished product and happy with how it came together. 


This shot really showcases how well the binding matches certain fabrics in the Parisville line, especially the cameos and fans. Trouble is, it is hard to match a binding to all the fabrics in the line, and since I have them all in this quilt, it was a bit of an issue. But I decided to go big and bold. I quilted all of the blocks differently, because I like to make things difficult on myself, and I thought different shapes looked better with the fabrics. Some have boxes, some arches, some frames, some linked triangles. The I just quilted along the yellow center lines, parallel to the blocks. I tried a variegated Kin Tut thread, which was a first for me, and it was perfect for this quilt, since the yellow is a major hallmark of this colorway, and the reddish-pink binding compliments the other dominant color.


Here is a shot of the whole deal. It is likely hard to tell what the quilting looks like- my apologies, I need a new camera and perhaps a pro photographer to correct my poor quilting photos. At least you get an idea of what it looks like. Heh. The dimensions are about 36" x 42" and I have no idea what the binding fabric is called- it is the oldest fabric in my stash (predates it in fact) and was given to me with a pile of stuff.

To do list as of now (short version):
1) Plan for the Little Apples jelly roll I got from Di and The Intrepid Thread- maybe a string block quilt like FITF's or this modern tracks pattern from Me? A Mom?

2) Plan for the other Parisville quilts- I still have the other two colorways in FQs! I'm thinking one like Fussy Cut's kaleidoscope quilt and Fresh Lemons' Echino Squared. Or maybe one like this?

3) Decide on a palette for the Dead Simple QAL at Lily's Quilts. And if I can pull it off.
Dead Simple Quiltalong

WIP Wednesday at Freshly PiecedDoes this post count as a work in progress? I hope so- I need some advice on what you all think will work for my Parisville blues and purples and the Little Apples jelly roll!


As a side note, if anyone has a little one and needs a cool stroller, there's a giveaway for a Bumbleride Indie Natural at The Baby Guy Gear Guide. A straying from fabric and quilt giveaways for sure, but maybe worthwhile!

Monday, August 22, 2011

quick reminder to those needing a project (or a home for a project)

Kate at Swim Bike Quilt is having a quilt drive called 100 Quilts for Kids (see the button below and on my sidebar?) that is getting started up via sharing progress and finishes on Flickr and linking up September 28-30 or October 12-14 for prizes! So if you need some incentive to create a quilt to donate locally, consider this your call to action! Kate is giving away some lovely fabric this week for help spreading the word, so get over there, make a plan and donate a quilt (or many!) to those in need of them. 
Swim, Bike, Quilt
Now, if Kate could also inspire me to swim and bike, I would be in excellent shape, karmically (i doubt that's a word) and physically!

Sunday, August 21, 2011

machine/quilting issues

Major issues with my machine (yes, it did need some cleaning/maintenance, and that helped) and with quilting this Parisville quilt. The two things are very much inter-related. I quilted down a row of the big blocks and then realized my tension was all wonky and I had knots and skips on the back. Then my thread kept snapping or tangling- it was bad news.
Cue the realization that I needed to clean the lint from under my bobbin tray (yuck! especially when inhaled) and then do some maintenance. This helped my thread issues, but somehow did not keep me from making silly mistakes like keeping my backing from folding up on the edges and getting quilted on to the top (really???)
Apologies for all the parentheses. So I am using this time to vent. I also wanted to give a thanks to The Intrepid Thread and Diane from Random thoughts do or "di" for the Little Apples giveaway. Yay for Cali shops and blogs- I had my jelly roll the day after Diane emailed me to tell me I won! I am very excited. In fact, it is taking all I have not to just start a project with that instead and leave my Parisville to be quilted another day. This line is really soft and cuter in person than online- the colors are excellent. But readers will know that I do have a thing for grey lately.


In addition, the other nice news is my Parisville top was featured for Tula Pink week at Craizee Corners. Sharon is doing a giveaway for some Tula Pink fabric and patterns- I don't know if the Modern Alphabet pattern will be one of them, but I am hoping! I have never worked from a pattern before, and this one seems sufficiently over my head to be a good start!

Ooh, and I just thought of another fabulous thing to distract from the bad stuff- I also won a giveaway from Harmony at Harmony Art for some Amy Butler patterns. The patterns are fun- 4 bags and a neat apron- but then Harmony turned out to be a wonderfully gracious and friendly person, as well as a fabric designer. She creates a lovely array of organic fabrics and when I mentioned that I would have to pick some up she gifted me a few pieces. She's also in Cali, right near me. Small world. Thank you Harmony, you are wonderful! Here are the beauties I will be using to whip up an Amy Butler pattern or two (the top is called Evelyn and the bottom Let it Grow):


This is very therapeutic. Now that I have stated all these good things that have happened this week it does not seem so bad that I am having some sewing room issues. Thanks for listening!

Thursday, August 18, 2011

Kona Poseidon FQ quilt, take 1 (a finish)


It is finished, all quilted and bound. I love the way this quilt turned out, it looks so crinkly and wavy, which nicely balances the straight lines and rather straightforward piecing. This layout looks much better than the colors back to back, which is how I envisioned it the first time. My husband convinced me to go with the grey for the binding rather than pieced colors, and I think he was right.


Here are closeups of the individual sides. I have no idea what to call this pattern, I simply made it up, though it is obviously not complicated. 


I ended up piecing the back, because as I started to cut the reclaimed duvet I got from the Serena and Lily sample sale, I realized it was quite stained. Guess that's why they call it a deal. So I started cutting, and as usual I love the look of a pieced back more than a plain one. And I had a lot of fun just piecing it as I went with no real plan. The bottom pic is a closeup of the peacock print.

I have more plans for the rest of the Kona Poseidon stash, so keep your eyes open in the next few weeks. I am being pushed in the direction of a DNA blot-inspired quilt, so I am getting ready to geek it out. This quilt is small, as you can likely tell, my usual working size, though the proportions worked out a bit funky for this one- it is 42" x 56" I think. Now to quilt the Parisville top...

Wednesday, August 10, 2011

WIP Wednesday

Gonna make it, gonna make it...with my husband taking care of bedtime, I am going to squeak in a WIP post on a Wednesday! I quilted some at naptime today, using a method I just found on Kristen's blog So Happy. It primarily involves making un-straight lines, just wriggling the sandwich as you sew, which makes it my favorite, because I don't have to worry about keeping to a line.


I think I really love the results, I am just needing to decide if I want to do the whole quilt like this or just part of it. Maybe the green half to be quilted in squares/rectangles in green thread? Yet to be determined, as I only got through 1/4 of the quilt before naptime was over.


In related news, I checked out a quilting reference book from the library last night and learned a few things I should be doing but was not. See, I never took a class or really read a book, I have just been kinda winging it as I go along. Turns out my machine has this thing called a walking foot that makes it easier to quilt accurately. Hmmm. I tried it, and it worked well. Plus, it looks hilariously weird, and that helps to ease the pain of not figuring this out before.

My other WIP, the Tula Pink Parisville-utilizing one, has a backing fabric cut up (a Serena and Lily salvage again, from a sheet) and is all basted up like a turkey. It is awaiting my trip to buy quilting thread that matches and machine time stolen from the above quilt.

WIP Wednesday at Freshly Pieced

Monday, August 8, 2011

Sew Modern Monday: Amy Butler bag finish

This bag is my first Sew Mondern Monday post and my latest finish that remains unblogged- until now! This is the Amy Butler Blossom shoulder bag from her book Style Stitches.
I had heard this pattern was really challenging, and when I bought the fabric at Hip Stitch in Albuquerque on vacation they had made a sample for the shop and mentioned again that it was a lot of work because of the stiffness of the interfacing.
All that said, I loved making it, and was antsy to do so the moment I saw the pattern posted on Sew Mama Sew.

The fabric is from the Soul Blossoms line, Peacock Feathers in turquoise for the outer and English Garden in pine for the lining. This is my main issue with AB patterns- I love them, but I feel like I need to make them from her fabrics, because they will make the bag that much more beautiful.

The detail of the handle attachment was the part of the bag that really drew me into the project. It looks extravagant, but it was not that difficult to achieve. Matching up the fabric- well, that is difficult to achieve for me! I actually didn't even think of it here as I was cutting. Heh.
The lining was comparatively simple and I like the look of it. I modified the pattern (something I can't seem to help doing) and only added one divider panel inside, and omitted the zipper. Yes, a bit chicken of me, but I also didn't think I would use a zipper pocket.
The real issue for me is the closure. I used a magnetic closure, the ones that attach like brads, but I wanted to use an "invisible" closure. I bought one for this project (a Dritz magnetic sew-on closure) but couldn't figure out how to get it to work correctly. The magnet kept sticking to my sewing machine plate and messing up the stitches. So I ended up with an exposed closure, which I dislike for both aesthetic reasons and because it pulls the fabric each time you open the bag. Live and learn I suppose.

Does anyone have tips for how they attach these sew-on closures inside the fabric layers? I would appreciate the help! For the next one I want to make it work...hand sew maybe?

{Sew} Modern Monday at Canoe Ridge Creations

Wednesday, August 3, 2011

Work in progress Wednesday: Tula Pink Parisville quilt


WIP Wednesday at Freshly Pieced

So, I will cheat and show the finished quilt top first, so those who have other things to do can just take a glance, and then get into the process.

The quilt is small, about 40" by 50" and it is Tula Pink Parisville in the Sprout colorway, sashed with Kona Snow. I am not sure what to call the design, as it is a little bit of a cobble-together.

I searched and searched for ideas about what I wanted to do with this quilt, looked all over the Tula Pink Flickr group for ideas, because I have never worked with big prints that seem to need to be showed off before. Finally I found this Flickr picture, but I do not know how to contact the person who made the quilt to give them credit, so hopefully this will suffice. Update: found the designer of this pattern by cruising Sew Mama Sew, via Quilt Dad: it is a Happy Zombie pattern called Rectangle Reverie.

This fabric is part of the Fat Quarter Shop winnings I received and was so excited to work with. I really like the way it turned out, but it was not what I planned.


I originally planned it to look like the quilt from the Flickr pic, but I sketched it out quickly before my son woke up one day and never referred back to the photo. So I made some notes on my original sketch, squashed a lot of numbers in, calculated what I would need to measure and cut, and then cut. I am impetuous like that, or spontaneous, or something that borders on impatient.


I didn't spot my error until I actually sewed everything together and laid it out. Do you see it? It only seems like an error (I hope) when compared with the original quilt. The sashing of the smaller yellow pieces between the large prints are supposed to line up square with the middle of the large prints. But I mis-read the photo and my sketch and made them so they do not line up at all with the large prints.


Maybe this pic makes it more clear. So what did I do to correct my error? Nothing! Laziness or ambivalence wins again, because I looked at it, thought "eh?" shrugged my shoulders and carried on. I actually do like it now, and moreover, when I calculated what I would have to do to fix it, I decided against it completely.

I wanted to share all this because the finished product looks nice (if I do say so myself) but I like what I have been seeing on others' blogs about process and showing mistakes or otherwise imperfect parts of beautiful quilts. So I am taking the process pledge and starting with that honesty now. I am a perfectionist at heart, but my way of sewing and quilting is a break from that, and my methods don't allow it!

Please see the button below for the pledge.


The Process PledgeI, Amorette, pledge to talk more about my processes, even when I can’t quite put them in the in words or be sure I’m being totally clear.   I’m going to put my thinking and my gut feelings out there. 


Tuesday, August 2, 2011

Where I sew


I wanted to add a photo of where I sew. It is not too fancy, for sure, though that new chair really classes up the joint, eh?
Mostly I wanted to show this to underscore my point about taking time for yourself, mom or not, to do something creative, productive (in a non-essential way), and all your own. I do not have all the best equipment; sometimes my machine drives me crazy with its inadequacies, my table is wobbly when I sew too fast (there's a Zen lesson there), and my rotary cutter for some reason always dulls fast. My cutting mat is shared with my architect husband for model building. There's a lack of table space, so I use the guest bed.


But I love to be out there and working! It is my space, my time, and I love to have something else going on while my toddler sleeps. I'm a young-ish stay at home mom and a housewife, and though it seems cliche to be quilting, I actually do enjoy the creative process.


Small New Blog Meet-Up


Monday, August 1, 2011

new sewing chair!

I got a new sewing chair on Saturday! I have been sewing on a very uncomfortable wooden folding chair, and I saw this at a Serena and Lily warehouse sale and couldn't pass it up- it was about 80% off from normal. Plus, gorgeous fabrics, very nice shape and has casters on the front to make it easy to move. The armless chair is the way to go- I like to be able to hop up quickly to iron my seams!
Posted by Picasa

I also wanted to share a link for a giveaway of some lovely fabrics from a Portland, Oregon designer (who doesn't love elephants on a quilt?) at Lily Pad Quilting: http://lilypadquilting.blogspot.com/2011/08/we-have-new-sponsor-and-giveaway.html

If you win it, I will make something for you if you do not sew! Promise! I am very motivated and prolific these days!