Showing posts with label Sew Modern Monday. Show all posts

Thursday, February 9, 2012

I Heart February post- a preview of my first tutorial!

I could not resist making a Valentine's Day related project, especially after I spied a fun linky and contest over at Pink Chalk Studio's blog, and a contest for a tutorial over at Sew Mama Sew. So I whipped up this heart hanging. I hope I will get my first tutorial written for it later this week. Edited to add: here is the link for the tutorial!

First off, I have been doing some reading on Zen and also on architecture- I know, bear with me. The book was called The Architecture of Happiness by Alain de Botton. In the very last bit, he writes about the Japanese concept of beauty and transience called wabi-sabi. (With apologies to any Japanese readers or scholars- I will misconstrue this, but only to the best of my abilities and intentions). The idea is that our ideas of beauty lie largely in perfection, while wabi-sabi is more about appreciating the beauty in asymmetry, organic, irregular objects or activities. Thus, the idea for this project was born and executed.

The whole aesthetic of this project is to embrace the raw, rough parts of fabric and sewing and take a break from the measured, perfect angles that quilting often takes. For me, it is a psychological break from my usual sewing room thinking.


It is a lot of sketchy sewing without much regard to linearity or spacing, though it is hard not to think of those things after sewing so long.
I laid down the strips with raw edges and sewed two lines down each pieced strip to secure them down. Then I reverse appliqued the heart shape on natural muslin.
This is one of the particularly rough sewed areas, and you may be just able to see the strips under the muslin layer.
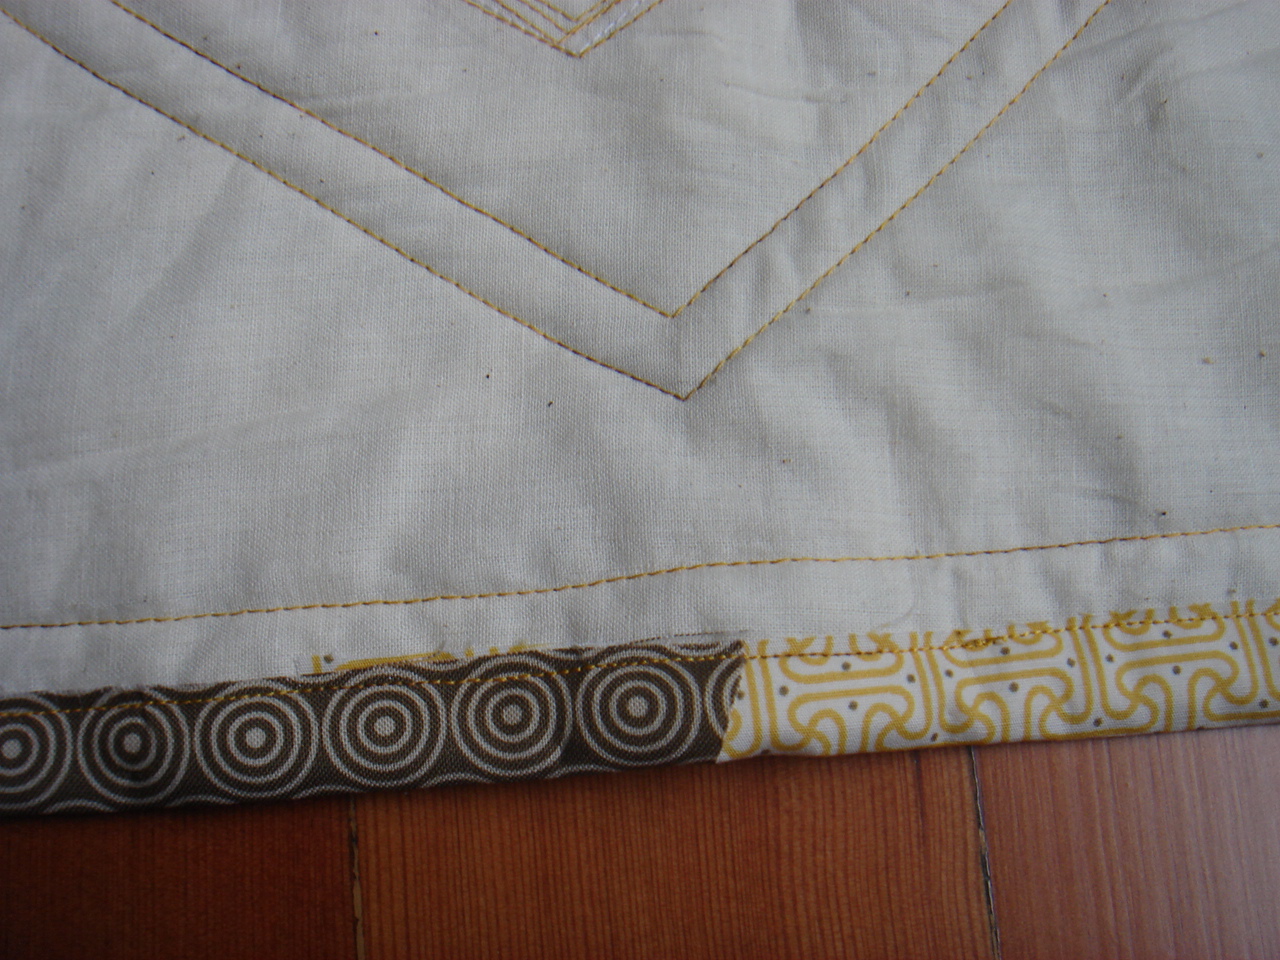
I only did a single 1.5" strip for binding and left raw edges on both sides, as well as at this joint of the binding.
The top edge, where I did some organic lines but did not like the way they looked enough to continue.
A closer view of the reverse applique stitches, in variegated thread.

Thanks for stopping by!

Linking to Pink Chalk...http://pinkchalkstudio.com/blog/2012/01/31/i-heart-february/

And Canoe Ridge Creations...
{Sew} Modern Monday at Canoe Ridge Creations

Sunday, January 29, 2012

Zig Zag baby quilt

So I find myself tonight listening to the monitor, waiting for my son to fall asleep, my husband downstairs studying, and me without much to do. My sewing stuff is in the basement and it is cold down there, and apparently my machine is loud and the sound really carries. Plus, I like music on when I am sewing, and Kanye coming through the vents is not conducive to my husband's concentration.  He suggested I write a blog post, but I have not much photogenic progress going on, just plugging along piecing my Sparkle Punch quilt...
Ah, yes! I never wrote a post about a quilt I made for my friend and co-worker's baby! And it is a missing link on my newly created Quilt Gallery page on this blog. A topic- success!

Back at my old, pre-baby job as a vet tech in a specialty surgery practice, I made an excellent friend who was having a baby. Well, this was before I got pregnant with my baby, and I was jealous. Three months later, I got over that (because I got a positive test, and the good hormones were raging) and I decided to make her a baby quilt.
I wanted to make a zig zag quilt, and to make things complicated I asked our coworkers if they wanted to each contribute a bit of fabric to make it, and then we would present it as a gift from all of us. My only guidelines were to get fabric in her nursery colors, brown and green. Then I got the fabric, and things got complicated. It was hard to make things look nice with that eclectic mix! Here I am trying out a layout- all one fabric, or all mixed up?

All mixed up, of course! Readers will know that I do love a crazy, wonky, lots-going-on quilt. And that I am really not skilled at taking good photos of my quilts! See below as evidence...
But you get the idea. I hope. I quilted in two different colors following the zig zag pattern, but not evenly spacing them, and doubled up some very close to the adjacent line. The binding was my first print binding- I had no other non-brown in any appreciable amount. But I love the look of it. The back is simply the brown on white print from the blocks. And I did not measure it, but is that really important? It's baby crib sized.
Can you believe I am a scientist at heart, who works in exactitude and vigilant record-keeping? Naw, me neither. This is my fun time hobby!

{Sew} Modern Monday at Canoe Ridge Creations

Monday, August 8, 2011

Sew Modern Monday: Amy Butler bag finish

This bag is my first Sew Mondern Monday post and my latest finish that remains unblogged- until now! This is the Amy Butler Blossom shoulder bag from her book Style Stitches.
I had heard this pattern was really challenging, and when I bought the fabric at Hip Stitch in Albuquerque on vacation they had made a sample for the shop and mentioned again that it was a lot of work because of the stiffness of the interfacing.
All that said, I loved making it, and was antsy to do so the moment I saw the pattern posted on Sew Mama Sew.

The fabric is from the Soul Blossoms line, Peacock Feathers in turquoise for the outer and English Garden in pine for the lining. This is my main issue with AB patterns- I love them, but I feel like I need to make them from her fabrics, because they will make the bag that much more beautiful.

The detail of the handle attachment was the part of the bag that really drew me into the project. It looks extravagant, but it was not that difficult to achieve. Matching up the fabric- well, that is difficult to achieve for me! I actually didn't even think of it here as I was cutting. Heh.
The lining was comparatively simple and I like the look of it. I modified the pattern (something I can't seem to help doing) and only added one divider panel inside, and omitted the zipper. Yes, a bit chicken of me, but I also didn't think I would use a zipper pocket.
The real issue for me is the closure. I used a magnetic closure, the ones that attach like brads, but I wanted to use an "invisible" closure. I bought one for this project (a Dritz magnetic sew-on closure) but couldn't figure out how to get it to work correctly. The magnet kept sticking to my sewing machine plate and messing up the stitches. So I ended up with an exposed closure, which I dislike for both aesthetic reasons and because it pulls the fabric each time you open the bag. Live and learn I suppose.

Does anyone have tips for how they attach these sew-on closures inside the fabric layers? I would appreciate the help! For the next one I want to make it work...hand sew maybe?

{Sew} Modern Monday at Canoe Ridge Creations