This project is for you if you want a break from precision quilting and sewing, if you need to make something quickly for a certain holiday, and if pink and red are not your valentine's most favorite colors.
I love it for some of these factors, but mostly for the wabi factor of it: an interpretation of a Japanese aesthetic embracing the beauty in irregular, organic work with the process evident. I posted a bit about this yesterday. Okay, enough background. Here we go!
(As I mentioned, this is my first tutorial, so please let me know if something is unclear or doesn't work in practice. I will edit to fix as needed.)
Finished size: 21.5" x 21"
All seam allowances 1/4"- or close
Fabric needs:
This project is perfect for scraps, which is all I used, all stuff I pulled from my stash and none larger than 22" x 22".
For the strips: 6 pieces, minimum 19" long and 1.5" high. (You could use 12 for less repetition.)
For the square to sew strips to: 14" x 14" (I used natural muslin here and for front piece)
For the overlaying front piece: 21" x 21"
For backing: 22" x 22"
For binding: 1.5" strips to get 85" in length (generous)
Assembly:
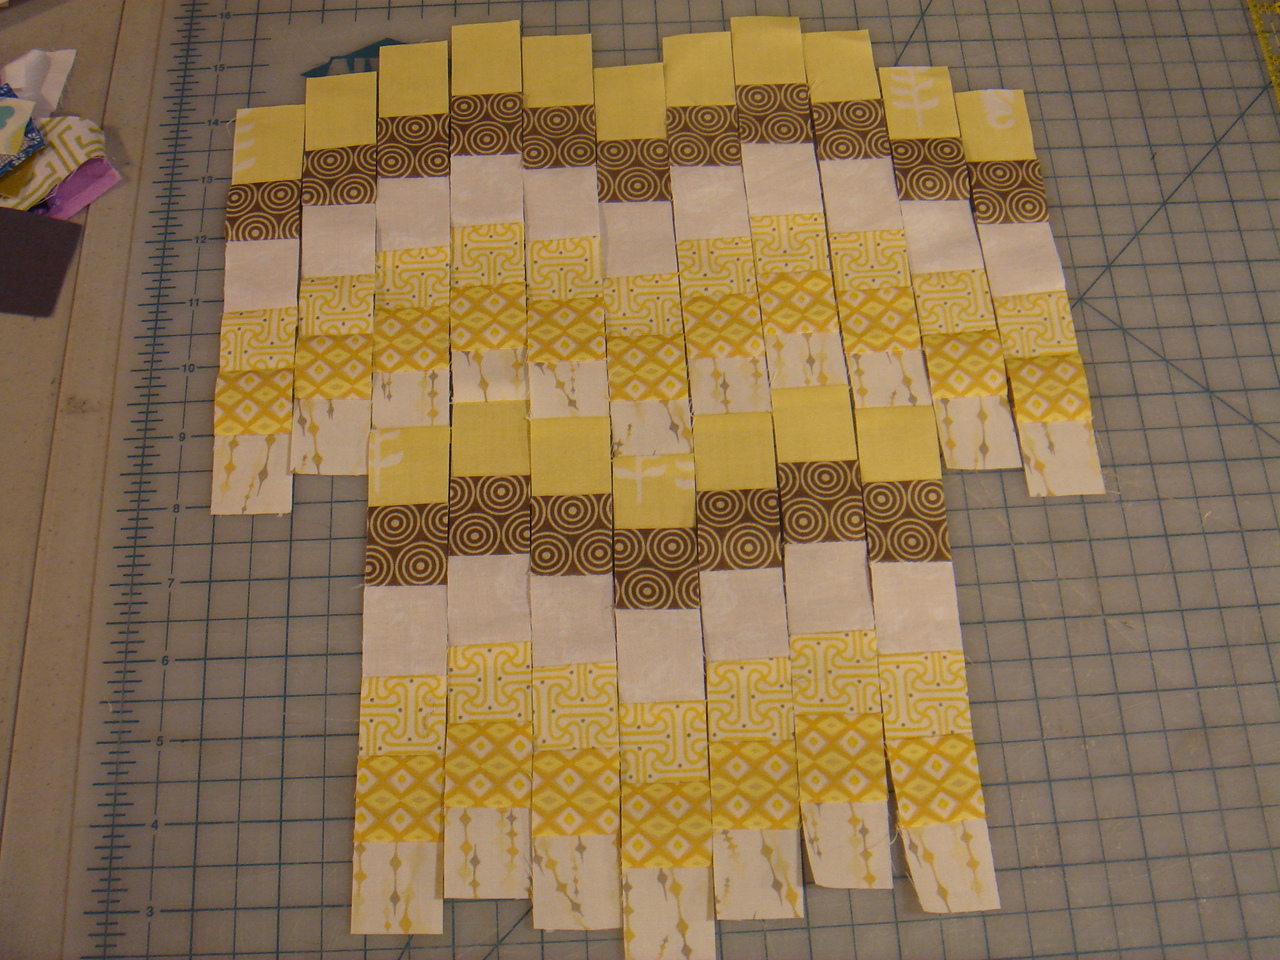
1. Sew your 6 strips together for the heart piece on the long side, right sides together, and press. I auditioned several arrangements and then changed my mind on the fly. Its part of the project! Embrace it.

2. Once assembled, cut from the short side into 1" strips (there is a little leeway in the 19" so you can mess up). This way you end up with strips of little blocks of each fabric.


3. Arrange your strips with small variations in height to approximate a heart shape: 11 strips make up the main part, and 7 below add extra length to the middle strips to make a decent heart. To make the top, I placed 1 strip in the center, then added to the sides, stepping up and then back down more steeply at the far sides.

4. Sew each of the bottom 7 strips to the 7 strips above them to get the extra length. Press.
5. Pin your strips in their arrangement to your 14" x 14" muslin square. Sew in place, using straight lines 1/4" from the long side of each strip. Or really, however you would like it to look. Sew once down the middle! Or three in each strip!


6. Now you are ready to place the 22" x 22" muslin square on top of the pieced strips. I sketched a rough heart at this point to place my pins, since we will be sewing in a heart shape, and I do best with multiple guidelines. Plus, it helps to make sure you keep your heart over the pieced strips and don't stray too much. Pin in place.
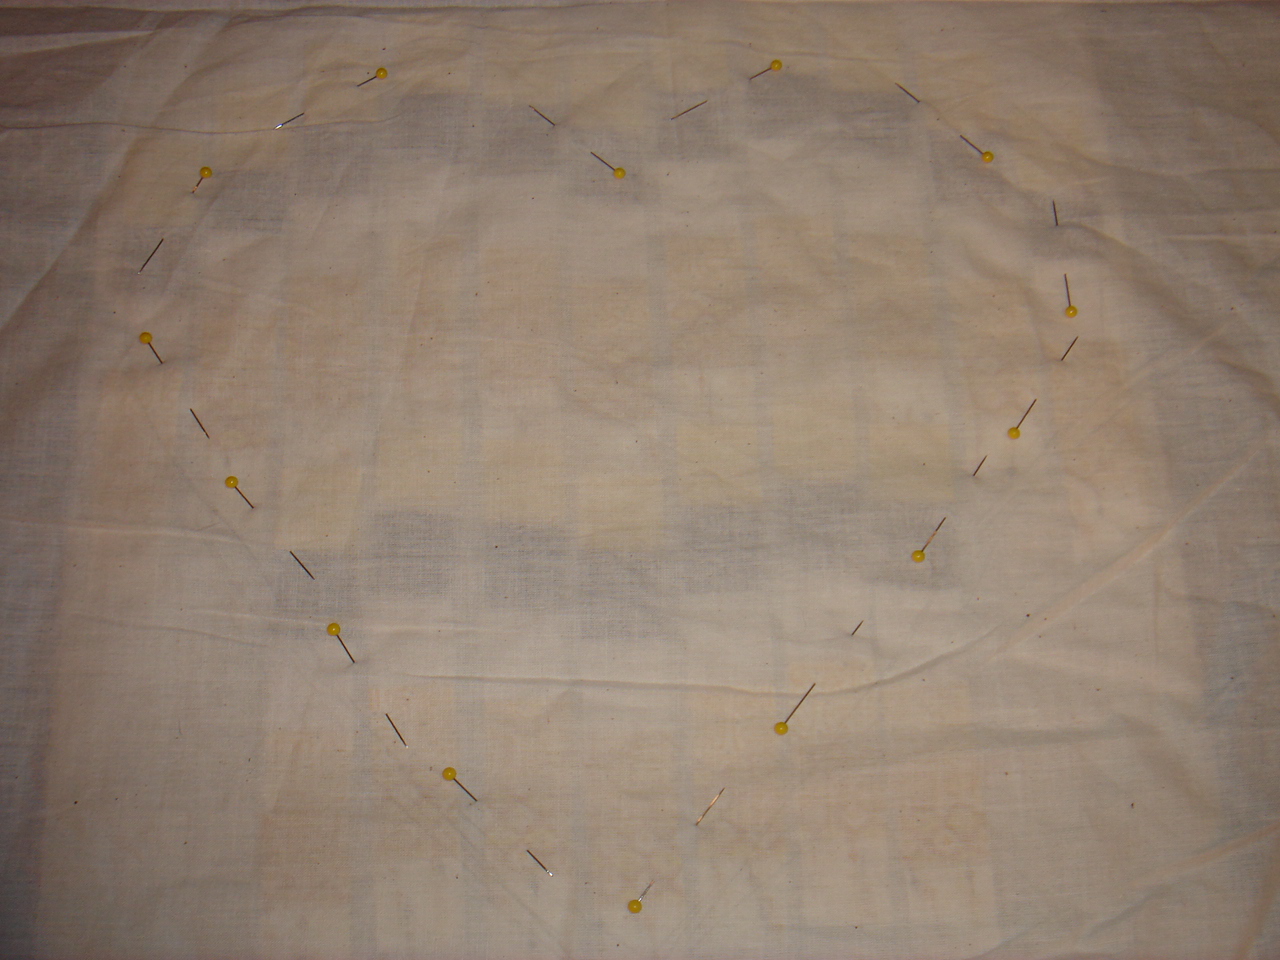
7. Sew a heart shape to piece your muslin squares together. I sewed mine 5 times, once in white thread and 4 in yellow/brown variegated thread, making sure to cross lines and sew at different distances to create a sketchy look.


8. Cut out inside the sewn lines to show the pieced heart.


9. Square up your muslin as needed.
10. Make your quilt sandwich with backing, batting and top. Baste.

11. Quilt, roughly following the heart shape at different distances and keeping the sketchy-look end product in mind as in step 7. I also did a line about 2" from each edge, and some random lines in the top right corner. Again, whatever looks right to you.


12. Trim up and square as needed.
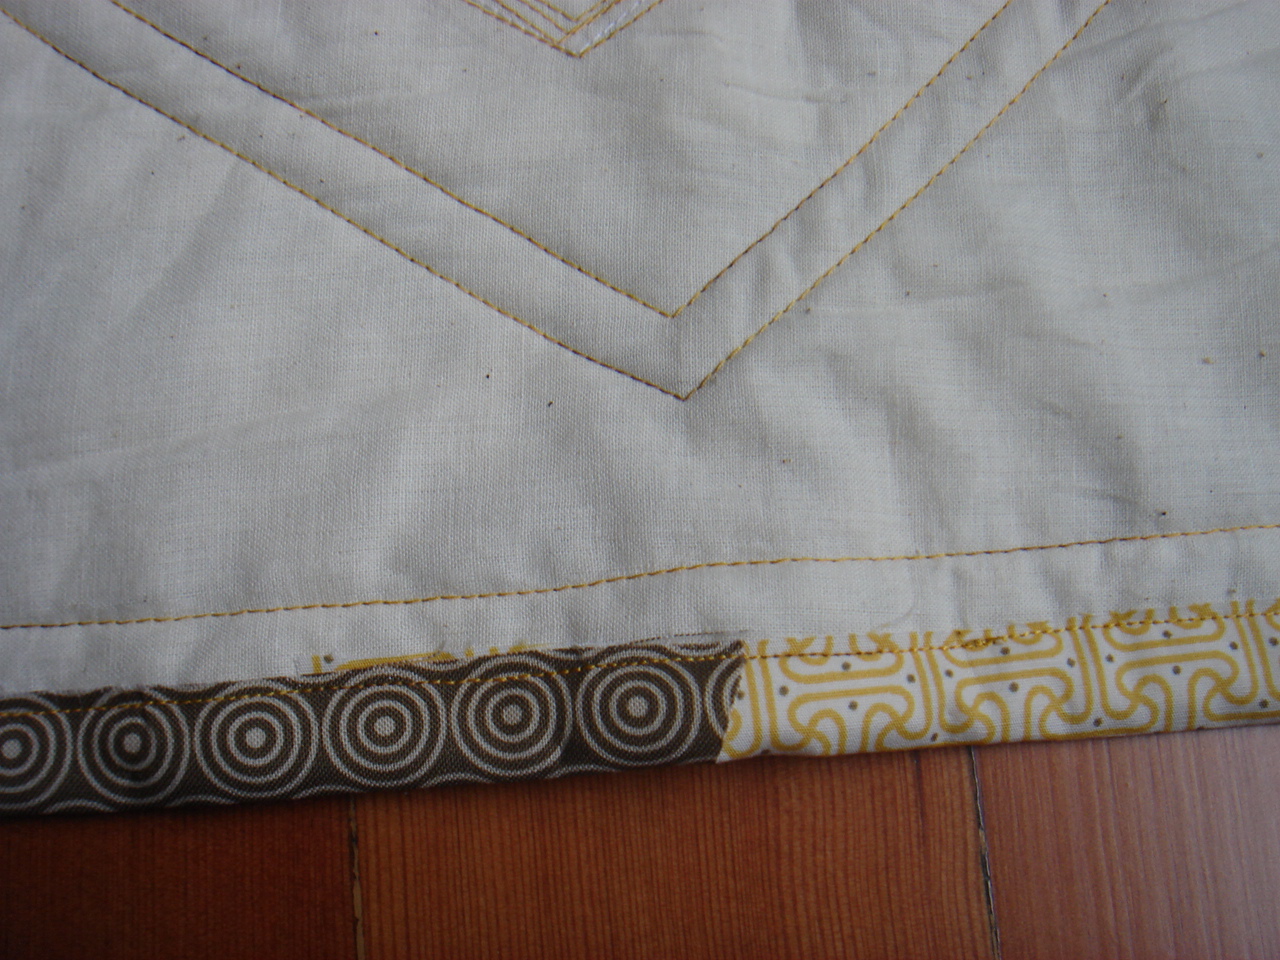
13. Place and sew the binding. I did a single fold raw-edge binding (which is why it seems so small) to keep with the wabi look. Fold your 1.5" strips in half and press, then begin placing in the center of the bottom. When you come to the corner, you can still do the mitered edge look by just moving your strip over to the next edge and coaxing the fold nice and flat. I sewed close to the raw edge, more like a finishing stitch than a 1/4" binding stitch. So simple though- one line to sew, and you're done!


When I came to the point where I would join the strips at the bottom, I just laid them on top of each other and sewed them down as above.


All done! It really does sew up quick. Here are some more finished shots, emphasizing the imperfect but nevertheless pretty aspects of the quilt:


Let me know if you make it- I would love to know if this makes enough sense and see someone else's!